Applesauce

The other day on my personal Facebook, I posted that I had made applesauce but wasn’t sure if I would post a recipe because it’s so easy, basically just 2 ingredients. I do have a few tricks for making it though, so I decided just to go with it.

Like a kajillion other recipes, this is crockpot applesauce – I think by far the crockpot is the way to go, because there is no stirring necessary. So you don’t have to spend your day babysitting the applesauce, you just turn it on and go.

However, unlike a lot of recipes I have seen, this applesauce is just dirt simple. It has no added sugar, no lemon, no butter. All of which I have seen added to recipes for no good reason, because if you are starting from good apples, none of that other stuff is necessary. Nothing but apples and cinnamon are necessary, and the cinnamon is optional.

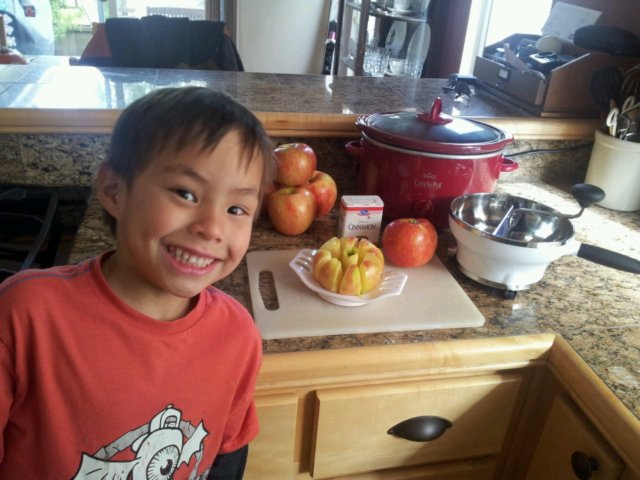
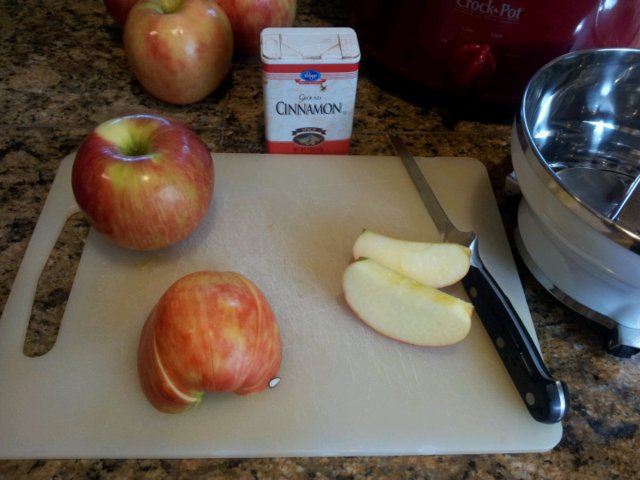
In the picture below, is everything you need to make applesauce – apples, cinnamon, an apple slicer or a knife, a crockpot and a food mill. Four year olds are good helpers, but are optional. The crockpot does the cooking, the food mill gets rid of the peels (I don’t pre-peel), and the slicer is just because I’m lazy and don’t like to slice apples with a knife (although I end up doing it anyway since some apples are too big for the slicer).

Applesauce!

4-5 lbs. apples (tart ones with strong apple flavor are best)
1 teaspoon cinnamon (optional, but highly recommended)

(This is for a 3 quart pot – if you have a bigger pot, scale up).

image

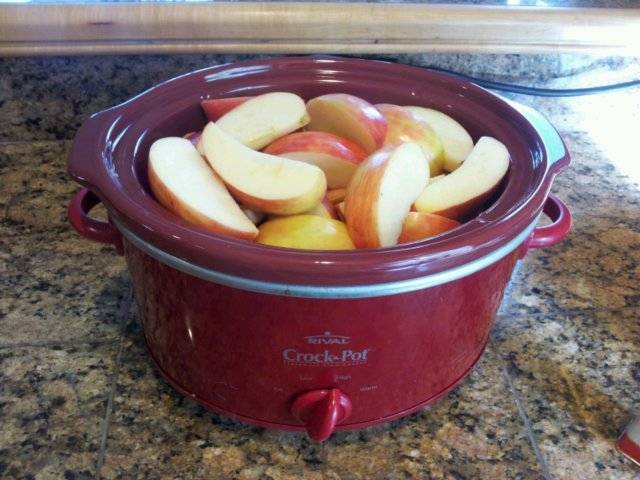
Wash and cut up the apples, remove cores and seeds, and put the apple slices in the crockpot. Peels can stay on if you have a food mill. I use Honeycrisp apples and they are the bomb, but kind of expensive. You can use any kind of tart apples. Granny Smiths are also good and usually cheaper and easier to find.

image

See? Peels on. Trust me, it will be okay.

image

Sprinkle one teaspoon of ground cinnamon on top of the apples. Cover the crockpot and turn to high for at least 4 hours or until apples are soft. You could also put them on low for 6-7 hours.

image

When the apples are done cooking, they look like the picture below. They will be completely soft, and the color from the peels will have leached out into into the juice. This, along with the cinnamon, gives kind of a rosy tint to the applesauce. Possibly green peels would be more green. Something to keep in mind.

image

Now it is time to use the food mill. Place your food mill over a bowl. Mine has different size screens so I use the largest one because I like my applesauce a little bit chunky. If you like yours smoother, use a finer screen.

image

Use a ladle to give the cooked apples a little stir, and then begin ladling the apples into the mill. Begin milling – the mill catches the peels and turns the apple flesh into sauce. Every so often, remove the peels from the screen, then continue milling until all apples are processed.

image

The end result:

image

Applesauce is good cold, but it is really a treat when still warm and served with ice cream. It’s like apple pie without the pie crust – delicious!
image

Peach Cranberry Pie

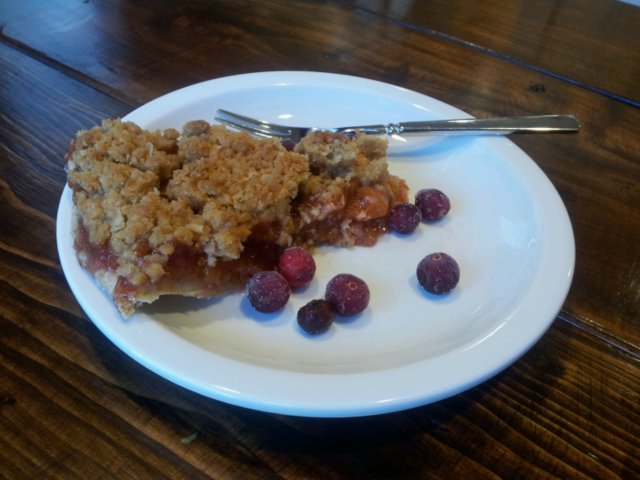
This is a pie I made to get rid of some frozen fruit I had in my freezer, and I sort of made it up as I went. I didn’t decide until I tasted the finished product that I would share it here, so I didn’t take a lot of pictures.

When I was reading about how to make a peach pie, I learned that peaches (especially frozen ones) are a bit tricky – you either have to cook the water out, or add a lot thickeners such as corn starch or flour. Personally, I tend to prefer the cooking method as it also serves to concentrate the flavors. But I decided to still add some thickeners to keep it from weeping out water after cooking, which leads to a soggy crust.

I also added cranberries because I like their tartness and just to make this a little bit more of an Autumn flavor.

Anyway, it turned out stupid good, so I had to share (and also remember what I did!). Thank goodness I have two children with 0% body fat that I am always trying to fatten up to help me eat all this stuff or I would be in trouble.

And it’s good that I run for the same reason!

image

Stupid Good Peach Cranberry Pie

The Crust

Make the Perfect Pie Crust from this recipe, and freeze half the recipe. Refrigerate the half you will use for at least 30 minutes prior to rolling out. You can refrigerate and roll out while the filling cooks.

Peach Cranberry Filling
2 quarts frozen peach slices
1 cup frozen or fresh cranberries
1/2 cup granulated sugar
1/4 cup packed brown sugar
1 Tablespoon ground cinnamon
1 Tablespoon corn starch
1/4 cup cold water

Defrost the frozen peach slices in the microwave, then place in a large cooking pot. Add sugars and cinnamon and bring to a slow rolling boil. Rinse cranberries and add to the boiling peaches. Boil until mixture starts to thicken – about 45 minutes to 1 hour.

While the filling cooks, and after the crust has refrigerated for about 30 minutes (or more), roll out the pie crust and place in the pie plate. Return to refrigerator until filling is ready.

After filling cooks for about 1 hour, dissolve corn starch in 1/4 cup cold water, add to the peaches and continue boiling on low heat about 5 more minutes. Turn off the heat and make the streusel topping.

Streusel Topping

3/4 cup brown sugar
3/4 cup flour
1/2 cup softened butter
1/2 cup rolled oats
1/4 teaspoon salt

Using a pastry cutter (or your fingers) combine the above ingredients until the butter is well distributed throughout and there is no longer a lot of dry flour in the mixture. The mixture should stick together and look sort of chunky.

Assembling and Baking

Preheat oven to 350 degrees. Remove the pie plate and crust from the refrigerator, and pour in the peach filling. Filling should fill the plate to a level about 1/4″ below the top of the plate. Don’t overfill the plate.

Sprinkle the streusel topping over the entire pie, covering all the filling, but mounded up somewhat in the middle. (It kind of flattens as it cooks).

Place the pie on a baking sheet and place in the oven. Bake for 45 minutes to 1 hour, or until the pie crust and streusel topping are golden brown.

Cool on a wire rack for at least an hour before eating.

image

Notice the small hole on the side of the pie? Some pie tasters had to pick a little bit off the side…

Banana Spice Muffins with Chocolate Chips and Nutella

Today we were having trouble with one of our cars, so going to the gym to work out wasn’t really possible. Evidently it needs a new starter, so we were down to one car. I did my long run yesterday, so it was supposed to be a recovery day anyway. However, when I don’t go to the gym I need to find something to do to keep Oleg (and myself) entertained. He likes helping with baking, so I decided to bake up some muffins. I had some old bananas around that were just right for making banana muffins, so I decided to go with that, with a few special tweaks. For instance we don’t put nuts in muffins – we put chocolate chips. Because they are better that way.

By the way, did you know that you can store overripe bananas in the freezer? It’s true. They always seem to go bad one or two at a time and you usually need 3 or 4 for baking. Just freeze them as they go bad and use them for muffins or banana bread once you have enough.

These are the muffins we made and they are every bit as ridiculously awesome as the name suggests.

Banana Spice Muffins with Chocolate Chips and Nutella

Dry Ingredients
2 cups flour (1 cup whole wheat, 1 cup white)
2 teaspoons cinnamon
1/4 teaspoon ground clove
1/4 teaspoon allspice
1 teaspoon baking powder
1 teaspoon baking soda
1/2 teaspoon salt

Wet Ingredients
4 overripe bananas, mashed
1 egg
1/4 cup oil
2 teaspoons vanilla
1/2 cup granulated sugar
1/2 cup packed brown sugar

Add Ins
1/2 cup chocolate chips
Nutella

Ready? Let’s go. Gather your ingredients.

image

Preheat oven to 350 degrees. In a small bowl (I actually just used a large measuring cup), stir together the dry ingredients until they are well mixed. Set aside. Oleg wants you to know he was in charge of this part. He did a very good job.

image

In a large bowl (I just throw everything into the bowl of a large stand mixer), pour in and mix together the wet ingredients.

image

When all wet ingredients are incorporated, slowly add the dry ingredients. Mix until wet and dry ingredients are fully incorporated.

image

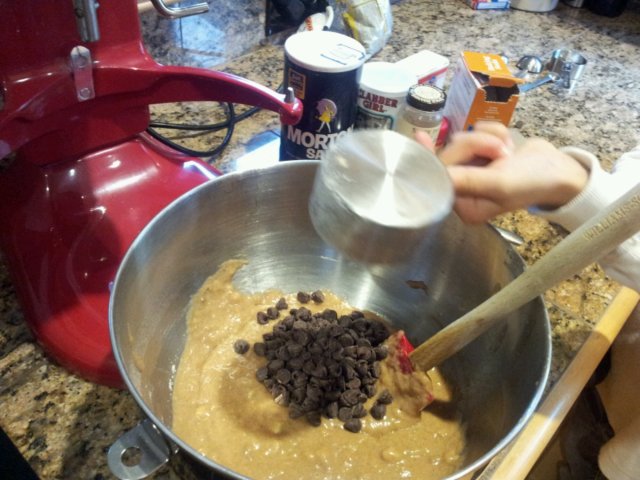
Stir in the chocolate chips.

image

Grease a muffin tin with butter. Kids can help with this part.

image

Scoop about 1/4 cup of batter into each muffin cup, filling each cup about 1/2 full (should fill all cups of one muffin tin). When tins are filled, scoop a small dollop of Nutella (about 1/2 to 1 teaspoon) onto the top of each muffin batter.

image

Swirl a toothpick around in the Nutella and batter to give a marbled effect.

image

Bake in oven for 12 to 15 minutes or until a toothpick inserted into the center of a muffin comes out clean (a little Nutella may stick, but the batter should not). Makes 12 muffins.

image

Oleg gives these his seal of approval. You can trust him. Not only is he an excellent baking assistant, he’s also a noted connoisseur of baked goods. His first English word was “cookie,” after all.

image