Almond Meal and What to Do With It

When I posted the recipe for almond milk, I said to make sure not to throw away the almond meal. In this post, I am going to tell you what to do with it.

What to Do With WET Almond Meal

image

When you’re done making almond milk, you will be left with about 1 and 1/2 cups of moist almond meal. There are many uses for this meal. You can store it for several days in the refrigerator and use it as a mix-in for smoothies. It will add fiber but not a lot of almond taste so it can go into just about any type of smoothie. A little goes a long way though.

You can also mix it into pancake or muffin batter to add some fiber and texture.

If none of these uses appeals right away, then you can also dry out the almond meal so that it can store longer. There are a variety of uses for dry almond meal.

What to Do With DRY Almond Meal

The process to dry out the almond meal is simple. Spread it out in a thin layer on a baking sheet (I lined mine with parchment but you don’t have to) and place in an oven at its lowest temperature – usually this is between 150 to 180 degrees. Leave the oven door slightly ajar to allow moisture to escape.

image

Leave the almond meal in the oven for 2 – 3 hours. Go for a run or something. When time is up, remove from oven. You now have almond meal that can be used as a crunchy, nutty coating to oven fry fish or chicken, in place of bread crumbs.

You can also make it into almond flour.

How to make almond flour

To make the dried almond meal into almond flour, simply place in a food processor using the chopping blades attachment, and process until the meal achieves a fine floury consistency. A minute or two should do it.

image

image

Place the processed almond flour into a glass jar and cover tightly to store.

Almond flour can be used in baking either mixed in with your usual flour, or on its own in certain recipes. A well-known use for it is in French macarons, which are made primarily from egg whites, sugar and almond flour. And buttercream filling. That’s sounding pretty good right now so you can probably look forward to seeing them in a future recipe!

Have you ever made almond flour? How do you use it?

Almond Milk

Let me get something out of the way here. I like cows milk. I prefer it to most of the alternative milks out there, and I think as long as you aren’t actually lactose intolerant, buying organic milk is the way to go. It has protein, calcium, vitamin D – all good things.

It is my preferred cereal moistener, coffee whitener, and cookie chaser.

However, I learned something about milk a couple of years ago that I previously didn’t know, which is that milk can interfere with iron absorption in iron deficient people. And since at that time I had a small child who was iron deficient, I investigated the different kinds of alternative milks, in hopes that one of them might be a better choice than dairy.

Almond milk was the main alternative I was willing to consider. Unlike soy milk, it doesn’t have a lot of plant estrogens in it. It’s not watery like rice milk, and it has a lot of vitamin E and iron in it from the almonds.

The main downside with it as compared to dairy milk is the packaging and preservation. Most almond milk comes in TetraPaks, which can stay shelf stable for months. The way this is accomplished is through ultra pasteurization. Most of the nutrition that would otherwise be in there is cooked out during that process. Plus it is full of additives. Some of the additives are okay, such as the vitamin E that they add back in to replace the vitamin E that leaches out in the preservation. But others are just unnecessary.

Ultimately, I decided that we would stick with milk but that we would only have it on cereal or with coffee or cookies. Otherwise, we generally do not drink milk. We have other dairy – yogurt and cheese mainly. We get our calcium and vitamin D from these other sources, my kid gets his iron without interference from the calcium, and it all works out.

Recently though, I learned that you can get around the problems with the almond milk you buy at the store by making your own. I always thought that making it must be really complicated, but it turns out it is the easiest thing ever.

All you need to make it is milk and almonds. Maybe a little salt and vanilla too, if you like. But neither are necessary.

Here’s the recipe and step by step.

1 cup raw almonds
1/2 tsp. salt (optional)
2-3 cups water for soaking
4-6 cups water for making milk
1/2 tsp vanilla (optional)

In a small cup or bowl, soak 1 cup almonds in 2 – 3 cups water, along with salt if desired. Soak at least 8 hours or overnight.

image

The almonds will about double in size, and the water will get a bit cloudy.

Drain off the water.

image

Measure the almonds. You should now have about 2 cups of almonds. Put them in your blender. Add double the amount of water as almonds. I.e., if you have 2 cups of almonds, add 4 cups of water to the blender.

Turn on the blender and blend for about 2 minutes.

image

Place a strainer over a bowl, and line the strainer with 2 pieces of rinsed cheesecloth. Pour the blended almond slurry through the cheesecloth to separate the almond meal from the milk.

You can also use an item called a “nut milk bag” to make this or any other kind of nut milk. I have never seen one. I just know they exist. I also think that the phrase “nut milk bag” sounds like a really bad insult – as in, “you nut milk bag!”

Sorry. I digress.

Back to the recipe. We were straining our nut milk (heheh). Periodically gather up the edges of the cheesecloth and squeeze out as much milk from the almond meal as possible. Place the almond meal into a jar or plate, rinse off the cheesecloth, and continue repeating this process until all the milk has been separated from the meal.

image

Pour the strained milk into your 1qt. storage container. Add the vanilla if desired, along with any sweetener. Shake, and store in the refrigerator. It should keep for 5 – 7 days.

Your final product will be about 4 cups of almond milk (if you started with 4 cups of water – more water will mean more almond milk) and about 1 and 1/2 cups of almond meal.

DO NOT THROW OUT THE ALMOND MEAL. There are many uses for it – if you dry it out in the oven it can be turned into almond flour and used as a gluten free substitute for wheat flour in baked goods. In a future post I will feature how to make almond flour as well as some of the uses of this almond meal.

image

This is a less processed version of the nut milk you buy at the store. One knock against it is that it is somewhat more expensive than buying it in the TetraPaks, but given the expense of almonds, one wonders how the manufacturers are making it so cheaply. Not many almonds and a lot of chemicals is my guess.

One way to reduce the cost is to add more water, but be aware that this is essentially just diluting the milk – it also dilutes the nutrition. If you want to maximize the nutrition from the almonds, the best bet is probably to make it full strength.

Another way to reduce cost is to find an inexpensive source for the almonds. I got mine at Costco in a 3 lb. bag for about $15. That’s $5 a lb. There should be about 3 cups of almonds in a lb., so that means it costs about $1.60 to make a quart of almond milk. However, since I love almonds, I am not sure how many will become milk and how many will go straight into my face. Because of this, it’s hard for me to say with any certainty how much it costs to make almond milk.

The main thing is, I like it, it’s easy to make, and I know it’s healthier to make it myself without the preservation and additives.

How about you? What do you think about alternative milks like nut milk and soy milk? Do you like them?

Holy Guacamole!

In honor of Cinco de Mayo (or Cinco de Drinko, if you prefer), I thought I would share my famous recipe for guacamole. It is one of my favorite foods. It’s like Franks Red Hot – I put that shit stuff on everything.

Note: I have kids so I do not, in fact, put Franks Red hot on anything. I’m more of a Tapatio or Sri Racha girl anyway.

Also, my guacamole is only famous at my house.

Okay, so not actually famous, but good.

Here’s how ya do it.

Holy Guacamole

2-3 avocados
Juice of 1 lime
1/2 cup salsa verde, any brand
1/2 cup of either sour cream, mayonnaise or fat free Greek yogurt
2 Tbsp. Fresh chopped cilantro leaf (optional)
1/4 cup chopped sweet onion (optional)
Salt and pepper to taste.

Gather your your ingredients.

image

Cut your avocados in half, remove the large pits, and scoop out the soft green flesh into a bowl. Use a fork to mash it up. You don’t want it completely smooth, you want to leave lumps about the size of a small pea in it. Lumps make it good.

Squeeze your limes into the bowl and stir. In a pinch you can substitute lemon but you’ll need to add extra salt and pepper. The citrus is important as it adds tart flavor and prevents oxidation (that’s when your guacamole turns all gross and brown).

Add the salsa verde and either the sour cream, mayonnaise or Greek yogurt. One of – NOT all three. Personally, I like the taste with mayonnaise best, but the Greek yogurt is also good, and I wanted to be a little healthier today so that is what I used.

Now’s the time to add cilantro and onion if you’re using them. You don’t have to and I usually don’t. It keeps better without them because the cilantro turns black after about a day, and the onion makes it a bit watery in my opinion.

Add salt and pepper to taste, grab a bag of corn chips and eat! It’s also great on burgers, tacos, burritos and with veggies as a dip.

Happy Cinco de Mayo!

What’s your favorite kind of hot sauce? Other favorite condiment?

image

Nutella Fruit Dip

Here’s a yummy, easy snack idea that’s pretty healthy, or at least as healthy as something that contains Nutella can be. It’s reasonably low in fat, with lots of protein. The fruit brings in vitamins and fiber. Great for sharing with kids.

1/2 cup non-fat plain Greek yogurt
1 heaping Tbsp Nutella
Sliced fruit of your choice (bananas and strawberries are great with this)

Stir the Nutella and yogurt together until it reaches a smooth, pudding-like consistency. In fact, you could just eat it by itself as if it were pudding. You could also just eat Nutella straight from the jar.

Not that I would know from personal experience or anything.

Apparently, you could also substitute peanut butter for the Nutella. I don’t know why you would want to do that, but you could.

Place your dip in a bowl and surround it with fruit for dipping, and go to town.

image

Open Face Egg Sandwich

The great Easter dilemma is upon us – what the heck do we do with all the hard boiled eggs after the Easter bunny has had his way with them?

Myself, I would like to go with making a big ol’ batch of egg salad egg-cept (ha!) for the fact that no one else in my house will eat it, and if I eat it all by myself, I will be fat. Because good egg salad = lots of mayonnaise.

Fortunately I did figure out a way to have the flavors of egg salad without all the fat and calories – an open face egg sandwich.

This is similar to one of my favorite sandwiches in the world, the open face egg and shrimp sandwich from the Ikea cafeteria. You don’t want me to get going about the Ikea cafeteria but I will just say this: I love that place.

I know – I’m wierd. Who loves the food at Ikea? Well, for what it’s worth, it’s also similar to a sandwich I once had at a cafe in Madrid. In both cases it was surprising how a simple egg, mayonnaise and bread could be so tasty.

Anyway, this version of the sandwich is a total win. Sliced eggs, tomatoes, lettuce, and a little mayo on whole wheat bread – totally simple, yet delicious.

Open Face Egg Sandwich

1 slice whole wheat bread
1 Tbsp. Mayonnaise
1 sliced egg
1 sliced Campari or Roma tomato
1 leaf of butter lettuce.

Spread the mayo thinly on the bread. Slice the eggs and tomatoes thinly – an egg slicer works great for the egg, not so much for the tomatoes. Arrange the lettuce, then tomatoes and egg on top.

That’s it – enjoy!

image

Healthy Asian Turkey Lettuce Wraps

These are about as Asian as my grandmother’s spaghetti is Italian, but they are equally as delicious and for the same reason – they both contain copious amounts of ketchup (which are, as we all know, a key ingredient in both Italian and Asian foods…right?).

This is a popular recipe at our house, because our kids love any food that they get to put together themselves. It’s also healthy – low in calories, fat and cholesterol, high in protein and actually tastes better with more veggies inside. The fresh pickled veggies add a nice zing and some crunch.

Healthy Asian Turkey Lettuce Wraps

1 tablespoon cooking oil
1 teaspoon dark sesame oil
2 cloves garlic, minced
1 small onion chopped
1 package ground turkey

The Sauce
1/3 cup hoisin sauce
1/2 teaspoon powdered ginger
2 Tablespoons soy sauce
1/3 cup ketchup
1 Tablespoon rice vinegar
Sri Racha sauce (optional to taste)

Hoisin
2 Tablespoon peanut butter
1 Tablespoon honey
4 Tablespoons soy sauce
2 Tablespoons ketchup
1/2 teaspoon garlic powder
2 teaspoons dark sesame oil
2 teaspoons rice vinegar
1/8 teaspoon black pepper

Serve With:

Romaine or Bibb lettuce

Cooked Brown rice

Pickled Veggies
1 small carrot julienned
1/2 cup bean sprouts
1/2 cup shredded cabbage
1 teaspoon white sugar
2 Tablespoons rice vinegar

Instructions:

Sauté your chopped onions and garlic over low to medium heat until they become translucent.

image

Translucent onions (not brown, just starting to be soft):

image

Add the turkey to the hot pan and brown, using your spatula to chop it up until it is nice and crumbly.

image

If you don’t keep hoisin on hand, now is the time to make your own using the ingredients listed above. It makes extra – put some on the table to serve and refrigerate the remainder.

Once your turkey is browned, then you add The Sauce.

image

I just shoot the hoisin, ginger, soy sauce, ketchup, vinegar and Sri Racha directly into the pan, but you could also mix it up in a bowl and then add it. Whichever way you go, mix well, and simmer the entire mixture on low heat for an additional 10 – 15 minutes.

The finished product:

image

To Serve

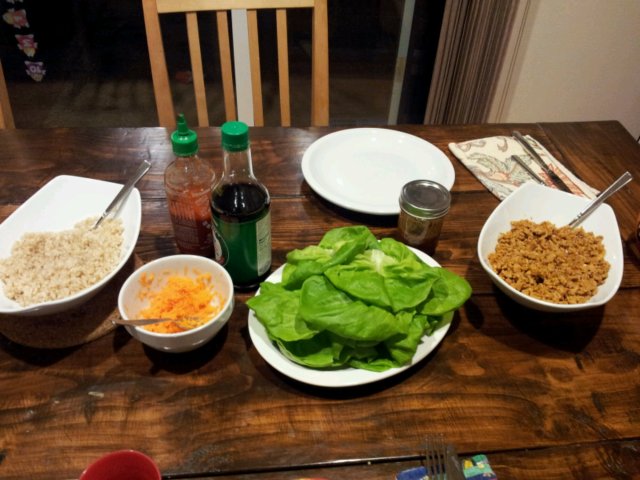
While the turkey simmers, wash and pat dry your lettuce leaves and arrange them on a serving plate.

In a small glass or ceramic serving bowl, prepare the pickled veggies by tossing the ingredients lightly together. Place on the table.

When meat has finished cooking, place in a serving bowl on table.

Also have soy sauce, hoisin and Sri Racha available on the table for those who want a bit more sauce in their sauce.

To eat, each person takes a lettuce leaf and puts the fillings of their choice (meat, vegetables, rice) inside, plus any additional sauce to taste. Wrap the lettuce leaf around the fillings like a burrito, and eat.

This serves 4 – 6, and is a great, healthy weeknight dinner.

image

Enjoy!

Mini Brownie Egg Nests

image

I am all about last minute Easter preparations around here, mostly because Easter always seems to sneak up on me. We haven’t dyed eggs yet, nor have we even found the Easter baskets. Time is running out. But I loved this idea so much and it seemed simple enough, so I decided why not? If nothing else at least I managed to do this – Easter will not pass without at least something to commemorate it as special.

Besides, I don’t know about you but my kids and I would rather eat a brownie with a candy covered chocolate egg on top, than a real egg, any day of the week.

You can do this recipe from a box mix, or you can do it from scratch. Scratch takes just a few extra minutes and gives you more control over what goes in. I went with the scratch option.

Mini Brownie Egg Nests

Wet ingredients
1/2 cup butter (1 stick)
4 Tbsp unsweetened cocoa powder
2 eggs, beaten well
1 cup sugar
1 tsp vanilla extract

Dry ingredients
3/4 cup whole wheat flour (because of course these are healthy brownies)
1/2 tsp baking powder
1/4 tsp salt

Topping
Sweetened shredded coconut
Nutella
Whoppers Robin eggs, Cadbury mini eggs, or jelly beans. We went with the Robin eggs, which can only fit one in the nests, but are still cute.

Instructions:
Gather your ingredients. Preheat oven to 350 degrees.

image

Melt the butter in the microwave – 40 seconds to 1 minute on full power.

image

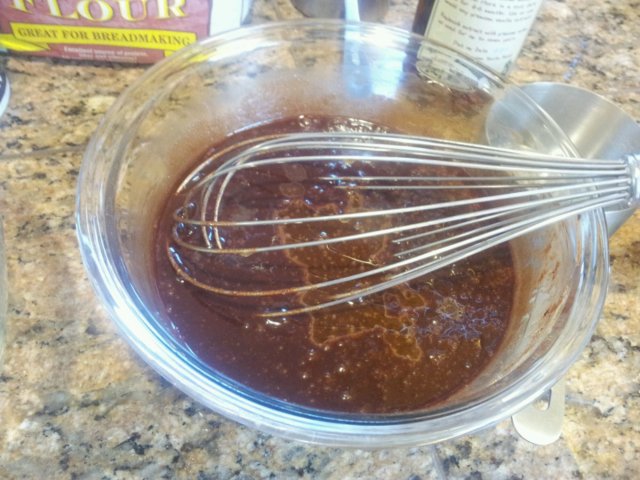
Stir in the cocoa powder, eggs, sugar and vanilla, mix until smooth.

image

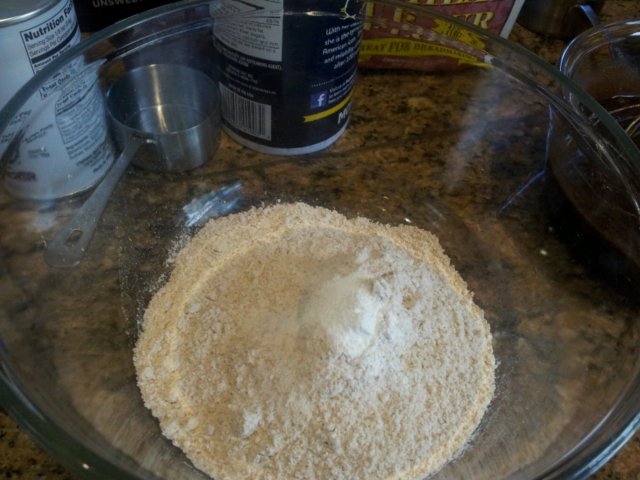
Combine dry ingredients in a bowl.

image

Stir dry ingredients into the sugar and butter mixture. Mix well until all ingredients are smooth and without lumps.

image

Measure by teaspoonfuls into a mini muffin pan. Each tin should be no more than 2/3 full (the nests are hard to get out if they puff up above the edge of the pan).

image

Place in hot oven for 5 minutes. Remove and sprinkle a small amount of sweetened coconut on top of each brownie.

image

Return pan to the oven for 10 minutes. The coconut will brown and will mimic the sticks in a natural bird nest.

image

Remove from oven, and while brownies are still warm make an indentation in top for your eggs to sit in.

Allow the brownie nests to cool before removing from pan – this is the Pinterest Fail portion of the recipe if you rush it.

Remove cooled brownies to a plate or cooling rack. Place a small dab of Nutella on the underside of your “eggs” and arrange them Nutella side down on top of the nests. The Nutella holds the eggs in place.

Plus, Nutella just makes everything better.

image

And voila – Mini Brownie Egg Nests!

Happy Easter!

Homemade Cranberry Sauce

I’m fighting a case of bronchitis, as it turns out, so for the last few days I’ve had to skip running. I tried to do a long run on Friday, but had to cut it short – that’s when I knew I was actually sick. Had to stop at 5 miles and all of them sssllloooowwww.

But that’s okay, there haven’t been any food posts around here in a while so maybe we can do that while I wait to get back on the road. I have a race in 6 weeks but it is just a 12k, so as long as I get well in the next couple of days I won’t lose much fitness. Trying to not worry about it.

Thanksgiving is right around the corner now, and the new cranberry crop (grown right here in Washington state!) is in. When our family visited the Long Beach peninsula last fall (where cranberries are grown) I bought 5 pounds of cranberries. I froze them, and am finally down to my last pound or so.

I decided to put my remaining berries to good use by making and canning some cranberry sauce for thanksgiving and Christmas. Cranberry sauce is so easy to make and so much tastier and healthier when you make it yourself, I don’t know why anyone buys the canned stuff. Here’s how to do it:

Homemade Cranberry Sauce

4 – 5 cups whole cranberries (1 bag as sold in supermarkets)
1 cinnamon stick
1 satsuma or small orange, zested and juiced
1 cup sugar
1 cup water

If you want to preserve the sauce, you will also need some canning jars, or freezer containers.

The recipe makes about 4 cups, so 4 half pint jars or 2 pint jars. You can use fresh or frozen cranberries.

To Prepare

Put cranberries in a pot, and put the pot on the stove.

Add the cinnamon stick and zest plus juice of the orange.

image

Add sugar and water, turn stove to medium high heat and bring to a boil, stirring frequently.

image

Cranberries will begin to make squeaky noises and burst open as they cook. Continue to boil and stir occasionally until the mixture thickens – about 30 minutes.

If you plan to can your berries, put on a pot of water to boil while the cranberries are cooking, with enough water to cover your canning jars. Use this water to disinfect your jars and lids, and to can. More instructions on the canning after the next step.

Remove cranberries from heat after 30 minutes and pour into food mill, placed over a large bowl. You can skip this step if you like your cranberry sauce with whole berries. People at my house like it a little smoother, so I mill it before canning.

Cranberries before milling:

image

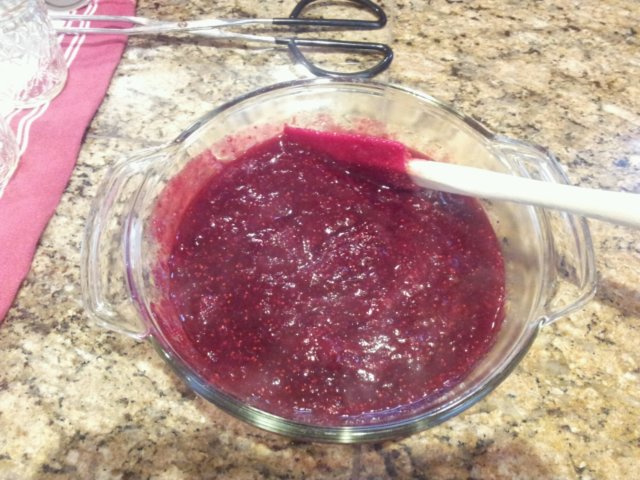
Cranberries after milling. Love the color!

image

To Preserve

While cranberries are cooking, put on a large pot of water to boil, with enough water to cover your canning jars when they are standing upright. Disinfect your empty jars and canning lids before use by placing them in the boiling water for a minute or two, laying on their sides. Remove from the water using canning tongs and place upright to dry with open end up while you finish milling the fruit. Don’t touch the insides of the jars or the underside of the lids to prevent introduction of bacteria.

After milling is complete and while sauce is still hot, pour the cranberry sauce into freezer containers, or your prepared canning jars.

If freezing, allow the sauce to cool before placing lids and putting containers in the freezer.

If canning, leave about 1/2 inch of headspace between top of sauce and the top of the jar to allow for steam expansion while canning in the water bath. This is what forces the air out of the jar and creates a good seal. Carefully place the canning lids and rings so that there is a seal that will still allow air to escape.

Place the covered jars into the boiling water. Water should cover the jars up to their “necks” but should not completely cover the jars – air has to escape and you don’t want water to get in.

image

Keep the jars in the boiling water to process for 15 minutes. Listen for the Ping sound that indicates the jars have sealed. The number of pings should be equal to the number of jars. If you don’t hear the ping, pull the jars out of the water at 15 minutes anyway and set aside to cool. Listen to any unsealed jars as they cool – they may yet ping to indicate a seal. When jars are cool, test for a seal by poking the top of the jar – if there is no bubble, then you probably have a good seal.

If the jars don’t seal, you can refrigerate or freeze the sauce. They will still keep in the refrigerator for a few weeks but won’t be shelf stable.

If properly canned and sealed, the sauce should keep for up to a year unopened. After opening, the sauce will have a shelf life similar to any opened, canned jam if kept refrigerated.

Caveat – this recipe gives canning times for canning at sea level (which it is, where I live). If you live at altitude, or if you have never canned before, I highly recommend reading up here before you start. I have done my best to ensure this recipe is safe, but with any type of canning it is best to ensure you thoroughly understand what you are doing before you get started, to ensure food safety.

Applesauce

The other day on my personal Facebook, I posted that I had made applesauce but wasn’t sure if I would post a recipe because it’s so easy, basically just 2 ingredients. I do have a few tricks for making it though, so I decided just to go with it.

Like a kajillion other recipes, this is crockpot applesauce – I think by far the crockpot is the way to go, because there is no stirring necessary. So you don’t have to spend your day babysitting the applesauce, you just turn it on and go.

However, unlike a lot of recipes I have seen, this applesauce is just dirt simple. It has no added sugar, no lemon, no butter. All of which I have seen added to recipes for no good reason, because if you are starting from good apples, none of that other stuff is necessary. Nothing but apples and cinnamon are necessary, and the cinnamon is optional.

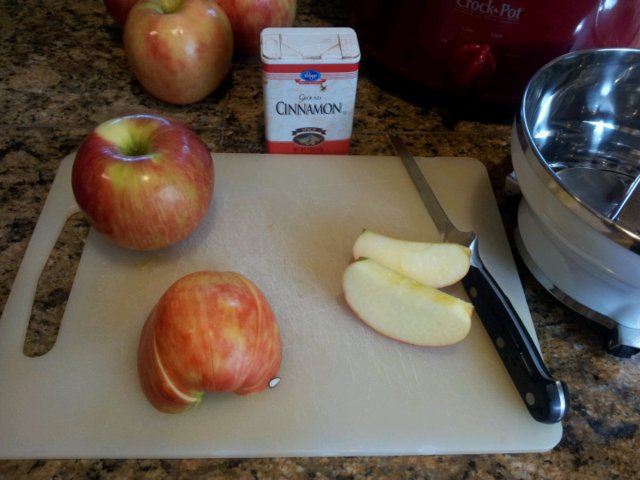
In the picture below, is everything you need to make applesauce – apples, cinnamon, an apple slicer or a knife, a crockpot and a food mill. Four year olds are good helpers, but are optional. The crockpot does the cooking, the food mill gets rid of the peels (I don’t pre-peel), and the slicer is just because I’m lazy and don’t like to slice apples with a knife (although I end up doing it anyway since some apples are too big for the slicer).

Applesauce!

4-5 lbs. apples (tart ones with strong apple flavor are best)
1 teaspoon cinnamon (optional, but highly recommended)

(This is for a 3 quart pot – if you have a bigger pot, scale up).

image

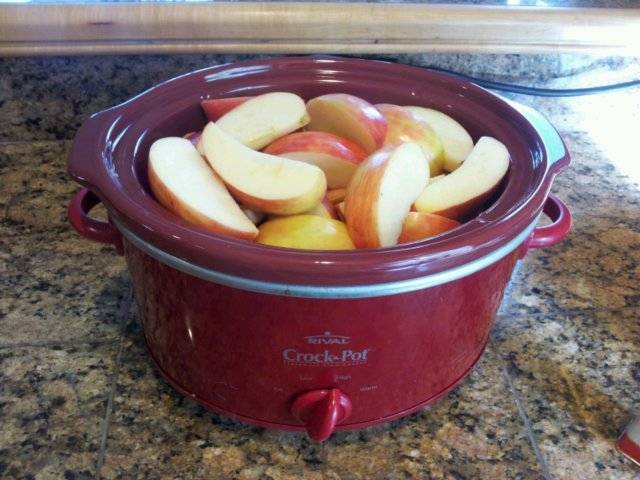
Wash and cut up the apples, remove cores and seeds, and put the apple slices in the crockpot. Peels can stay on if you have a food mill. I use Honeycrisp apples and they are the bomb, but kind of expensive. You can use any kind of tart apples. Granny Smiths are also good and usually cheaper and easier to find.

image

See? Peels on. Trust me, it will be okay.

image

Sprinkle one teaspoon of ground cinnamon on top of the apples. Cover the crockpot and turn to high for at least 4 hours or until apples are soft. You could also put them on low for 6-7 hours.

image

When the apples are done cooking, they look like the picture below. They will be completely soft, and the color from the peels will have leached out into into the juice. This, along with the cinnamon, gives kind of a rosy tint to the applesauce. Possibly green peels would be more green. Something to keep in mind.

image

Now it is time to use the food mill. Place your food mill over a bowl. Mine has different size screens so I use the largest one because I like my applesauce a little bit chunky. If you like yours smoother, use a finer screen.

image

Use a ladle to give the cooked apples a little stir, and then begin ladling the apples into the mill. Begin milling – the mill catches the peels and turns the apple flesh into sauce. Every so often, remove the peels from the screen, then continue milling until all apples are processed.

image

The end result:

image

Applesauce is good cold, but it is really a treat when still warm and served with ice cream. It’s like apple pie without the pie crust – delicious!

image

Peach Cranberry Pie

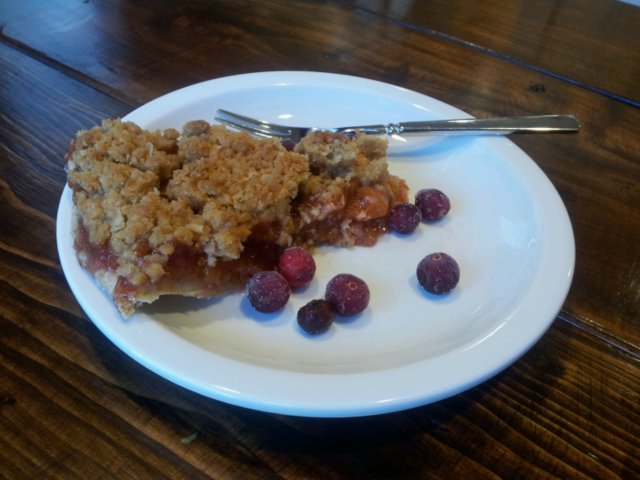
This is a pie I made to get rid of some frozen fruit I had in my freezer, and I sort of made it up as I went. I didn’t decide until I tasted the finished product that I would share it here, so I didn’t take a lot of pictures.

When I was reading about how to make a peach pie, I learned that peaches (especially frozen ones) are a bit tricky – you either have to cook the water out, or add a lot thickeners such as corn starch or flour. Personally, I tend to prefer the cooking method as it also serves to concentrate the flavors. But I decided to still add some thickeners to keep it from weeping out water after cooking, which leads to a soggy crust.

I also added cranberries because I like their tartness and just to make this a little bit more of an Autumn flavor.

Anyway, it turned out stupid good, so I had to share (and also remember what I did!). Thank goodness I have two children with 0% body fat that I am always trying to fatten up to help me eat all this stuff or I would be in trouble.

And it’s good that I run for the same reason!

image

Stupid Good Peach Cranberry Pie

The Crust

Make the Perfect Pie Crust from this recipe, and freeze half the recipe. Refrigerate the half you will use for at least 30 minutes prior to rolling out. You can refrigerate and roll out while the filling cooks.

Peach Cranberry Filling
2 quarts frozen peach slices
1 cup frozen or fresh cranberries
1/2 cup granulated sugar
1/4 cup packed brown sugar
1 Tablespoon ground cinnamon
1 Tablespoon corn starch
1/4 cup cold water

Defrost the frozen peach slices in the microwave, then place in a large cooking pot. Add sugars and cinnamon and bring to a slow rolling boil. Rinse cranberries and add to the boiling peaches. Boil until mixture starts to thicken – about 45 minutes to 1 hour.

While the filling cooks, and after the crust has refrigerated for about 30 minutes (or more), roll out the pie crust and place in the pie plate. Return to refrigerator until filling is ready.

After filling cooks for about 1 hour, dissolve corn starch in 1/4 cup cold water, add to the peaches and continue boiling on low heat about 5 more minutes. Turn off the heat and make the streusel topping.

Streusel Topping

3/4 cup brown sugar
3/4 cup flour
1/2 cup softened butter
1/2 cup rolled oats
1/4 teaspoon salt

Using a pastry cutter (or your fingers) combine the above ingredients until the butter is well distributed throughout and there is no longer a lot of dry flour in the mixture. The mixture should stick together and look sort of chunky.

Assembling and Baking

Preheat oven to 350 degrees. Remove the pie plate and crust from the refrigerator, and pour in the peach filling. Filling should fill the plate to a level about 1/4″ below the top of the plate. Don’t overfill the plate.

Sprinkle the streusel topping over the entire pie, covering all the filling, but mounded up somewhat in the middle. (It kind of flattens as it cooks).

Place the pie on a baking sheet and place in the oven. Bake for 45 minutes to 1 hour, or until the pie crust and streusel topping are golden brown.

Cool on a wire rack for at least an hour before eating.

image

Notice the small hole on the side of the pie? Some pie tasters had to pick a little bit off the side…